
Brown Butter Pistachio Crunch Yogurt Cups
These brown butter pistachio crunch yogurt cups are a viral-worthy no-bake dessert that comes together in minutes. Perfect for meal prep, they're creamy, crunchy, and naturally sweet.
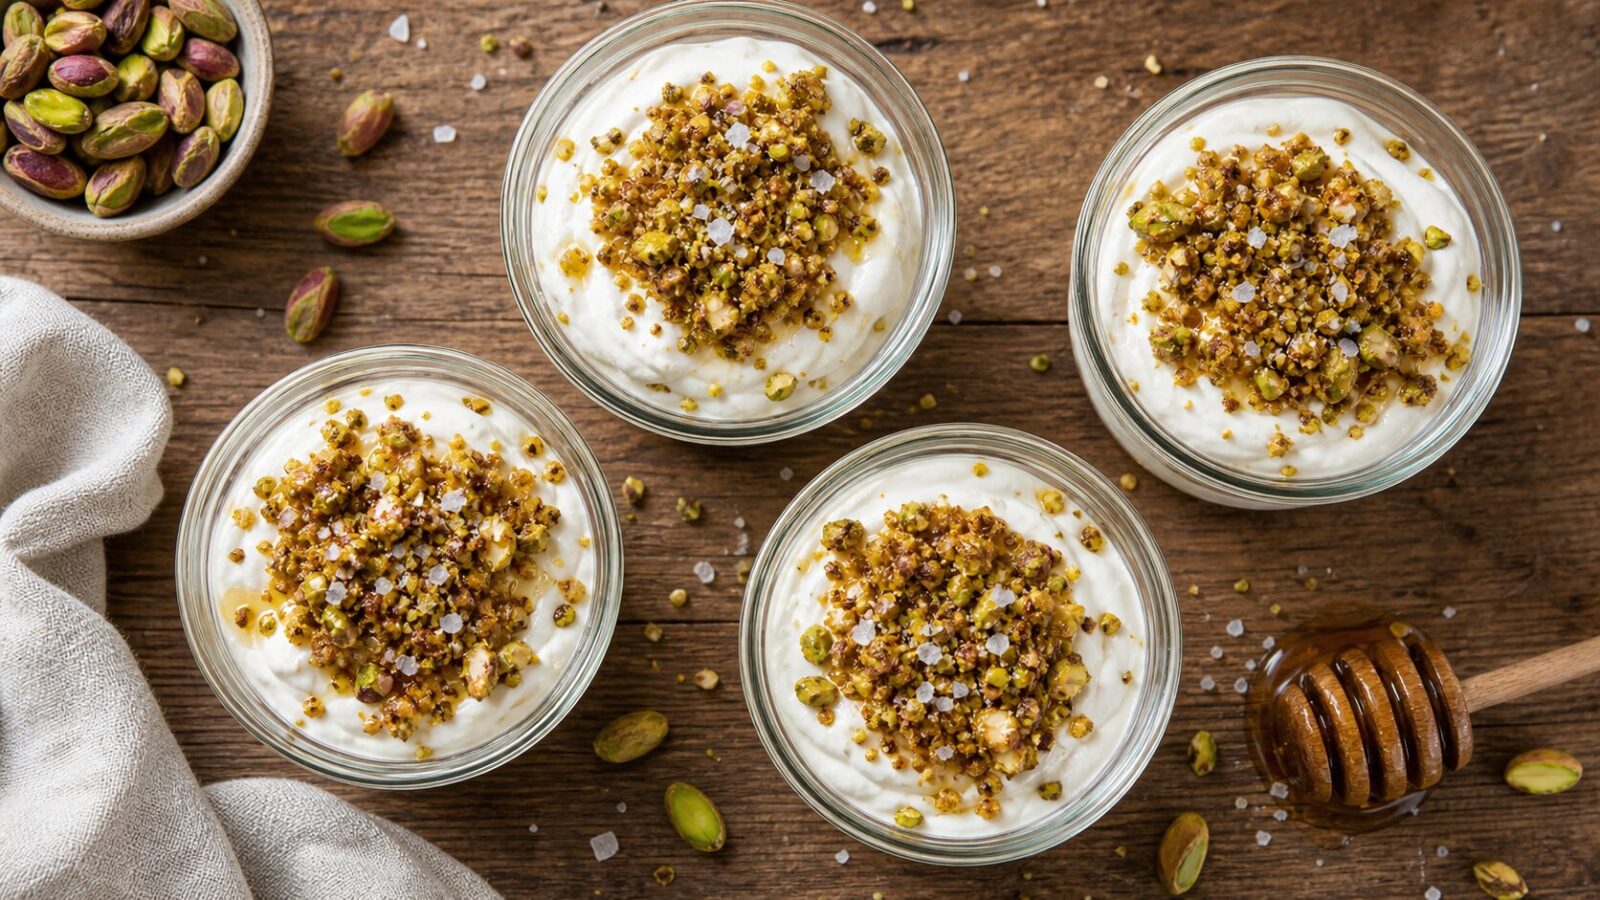
If you've been scrolling through social media wondering about those viral yogurt cups everyone's raving about, let me introduce you to my version: Brown Butter Pistachio Crunch Yogurt Cups. They're everything you want in a quick, satisfying dessert—creamy, crunchy, buttery, and just sweet enough. And the best part? No baking required. These little cups are perfect for busy weeknights, lunchbox treats, or a make-ahead snack that actually stays crunchy.
I love recipes that feel special but take almost no effort. These yogurt cups are exactly that. The brown butter adds a nutty, caramel-like depth that pairs beautifully with the pistachios and a touch of honey. The crunch layer stays crisp thanks to a simple trick with toasted nuts and a bit of coconut oil. And since they're built in individual servings, they're perfect for portion control and grab-and-go mornings.
Whether you're a seasoned home cook or just starting out, this recipe is foolproof. It's one of those rare desserts that feels indulgent yet light, making it a hit with both kids and adults. Let's get into why you'll love these cups.
Why You'll Love This Recipe
- No baking required: This is a completely no-bake recipe. Just toast the nuts and brown the butter—everything else is assembly. Great for hot days or when you don't want to turn on the oven.
- Make-ahead friendly: These yogurt cups stay good in the fridge for up to 5 days, and the crunch topping keeps its texture. Perfect for meal prep or having a healthy dessert ready when cravings hit.
- Naturally sweetened: Using honey (or maple syrup) means no refined sugar. You can adjust the sweetness to your taste.
- High protein: Greek yogurt packs a protein punch, making this a satisfying snack that keeps you full.
- Crunchy and creamy contrast: The buttery, nutty crunch topping pairs perfectly with the smooth, tangy yogurt. Every bite is a texture party.
- Beginner-friendly: This recipe is straightforward with simple steps. If you can stir and spoon, you can make these.
- Customizable: Swap nuts, change the sweetener, or add fruit—the possibilities are endless. See the Variations section for ideas.
- Kid-approved: My kids love helping sprinkle the topping. They also love eating them. It's a win-win.
Ingredients
- 1/2 cup unsalted butter (for browning)
- 1 cup shelled pistachios, roughly chopped
- 1/4 cup honey (or maple syrup for vegan)
- 1 teaspoon vanilla extract
- 1/4 teaspoon sea salt (plus more for topping)
- 2 cups plain Greek yogurt (full-fat or 2% recommended for creaminess)
- 1/4 cup coconut oil, melted (optional, for extra crunch stability; see notes)
- Optional toppings: dried rose petals, flaky sea salt, extra chopped pistachios
Optional Substitutions
- Greek yogurt: Use dairy-free yogurt like coconut or almond-based for a vegan option. Note that the texture may be less thick. You can also use skyr or labneh.
- Honey: Maple syrup or agave nectar work 1:1. For sugar-free, use monk fruit syrup or stevia drops to taste.
- Pistachios: Almonds, walnuts, pecans, or hazelnuts are great substitutes. Roast them first for extra flavor.
- Butter: Use vegan butter or coconut oil for a dairy-free version. Browned coconut oil works too but has a different flavor.
- Coconut oil: Omit if you prefer a less firm crunch layer. It helps the topping stay crunchy longer.
- Vanilla extract: Almond extract adds a lovely nutty undertone that pairs well with pistachios.
- Sea salt: Skip if using salted nuts or butter. Adjust to taste.
Instructions
- Brown the butter: Place the 1/2 cup unsalted butter in a small saucepan over medium heat. Stir frequently with a rubber spatula. The butter will foam, then bubble, and eventually turn a golden amber color with a nutty aroma. This takes about 5–7 minutes. Watch closely to avoid burning. Once browned, remove from heat and let cool slightly.
- Toast the pistachios: While the butter browns, heat a dry skillet over medium heat. Add the chopped pistachios and toast them, stirring often, until fragrant and lightly golden, about 3–4 minutes. Remove from pan and let cool.
- Make the crunch topping: In a medium bowl, combine the browned butter (still warm but not hot), toasted pistachios, honey, vanilla extract, and sea salt. Stir until well mixed. If using melted coconut oil, stir it in now. The mixture should look like a chunky, sticky paste. Set aside.
- Prepare the yogurt base: In a separate bowl, whisk the Greek yogurt until smooth. If you want a sweeter yogurt, you can add a little extra honey or vanilla. Set aside.
- Assemble the cups: Spoon about 1/4 cup of yogurt into each serving cup or small bowl (4–6 servings depending on size). Smooth the top with the back of a spoon.
- Add the crunch layer: Evenly divide the brown butter pistachio mixture over the top of each yogurt cup. Use a spoon to spread it gently—it should form a thin, chunky crust. Sprinkle a pinch of flaky sea salt on top if desired.
- Chill: Place the cups in the refrigerator uncovered for about 10–15 minutes to let the topping set slightly. Then cover with plastic wrap or lids.
- Serve: These are best enjoyed cold or at room temperature. The topping will be firm yet crunchy. If stored longer than a day, the topping may soften slightly but will still be delicious.
Pro Tips
- Don't skip browning the butter: This is where the magic happens. Browned butter adds a deep, toasty flavor that takes these cups from good to unforgettable.
- Chop pistachios evenly: You want a mix of small pieces and a few larger ones for texture. Avoid turning them into powder.
- Toast nuts gently: Nuts burn quickly. Keep them moving in the pan and remove as soon as they smell fragrant.
- Cool the browned butter slightly: If it's too hot when you mix it with the other ingredients, it can melt the honey and make the topping too runny. Let it sit for 2–3 minutes after browning.
- Use full-fat yogurt: For the creamiest, most luxurious texture, stick with full-fat Greek yogurt. Low-fat or fat-free versions can be watery and less satisfying.
- Set the topping before covering: Let the cups sit uncovered in the fridge for at least 10 minutes so the topping firms up. If you cover them immediately, condensation can make the topping soggy.
- Make extra crunch topping: Double the topping recipe and store it in the fridge for up to 2 weeks. Sprinkle it over oatmeal, ice cream, or pancakes for an instant upgrade.
- Adjust sweetness to taste: If you prefer a less sweet dessert, reduce the honey or use a plain yogurt with a bit of vanilla. The brown butter itself adds a subtle sweetness.
Variations and Substitutions
- Berry Swirl Yogurt Cups: Add a layer of homemade strawberry or raspberry jam between the yogurt and crunch topping. Swirl it in for a fruity twist.
- Chocolate Lover's Version: Add 2 tablespoons of cocoa powder to the yogurt and use chocolate chips in the crunch topping instead of (or in addition to) pistachios. A pinch of espresso powder enhances the chocolate flavor.
- Vegan Version: Use plant-based yogurt, coconut oil instead of butter (brown it gently), and maple syrup instead of honey. The topping will be slightly different but still delicious.
- Cinnamon-Spiced: Add 1/2 teaspoon ground cinnamon and a pinch of nutmeg to the crunch mixture. It pairs wonderfully with the brown butter.
- Lemon-Pistachio: Add 1 teaspoon lemon zest to the yogurt and a squeeze of lemon juice. The bright citrus cuts through the richness beautifully.
- Trail Mix Style: Replace half the pistachios with a mix of chopped almonds, pecans, and a few dark chocolate chips. Add a tablespoon of shredded coconut for extra texture.
- Savory-Sweet Twist: Reduce honey to 1 tablespoon and add a pinch of cayenne pepper or smoked paprika to the crunch topping. The heat contrasts with the cool yogurt.
Storage and Reheating
Fridge
Store the assembled yogurt cups in the refrigerator, covered, for up to 5 days. The topping may soften over time but will still be crunchy for the first 2–3 days. For best texture, serve within 2 days.
Freezer
These cups freeze surprisingly well. Place them in a freezer-safe container (without lids if using glass) and freeze for up to 1 month. To serve, thaw in the fridge overnight. The topping will lose some crunch, but the flavor remains excellent. You can also eat them partially frozen for a froyo-like treat.
Reheating
You don't need to reheat these cups! They're best enjoyed cold or at room temperature. If you want to revive the crunch after freezing, you can pop the cups in a 300°F oven for a few minutes (watch carefully) or use a kitchen torch to gently crisp the topping. But honestly, they're perfect straight from the fridge.
FAQ
Can I use regular (not Greek) yogurt? Yes, but the texture will be thinner and more liquid. Strain regular yogurt through a cheesecloth-lined sieve for a few hours to thicken it, or use a thicker variety like skyr.
How do I keep the topping crunchy? The key is to let the cups chill uncovered for 10–15 minutes before covering, so the topping sets. Also, using melted coconut oil helps stabilize the crunch. Eat within 2–3 days for maximum crunch.
Can I make these dairy-free? Absolutely. Use a thick coconut or almond-based yogurt, replace butter with coconut oil (brown it gently), and use maple syrup. The flavor will be slightly different but still delicious.
What if I don't have a kitchen scale for the butter? No worries! 1/2 cup of butter is 1 stick (4 ounces). Just use a standard measuring cup.
Can I use raw pistachios? Yes, but toasting them is highly recommended for flavor and crunch. Raw nuts can be chewier. Toast them as directed in the instructions.
How many servings does this recipe make? It depends on your cup size. For 1/2-cup servings, you'll get about 4–6 cups. For smaller portions, you can make 8 small cups.
Can I add fruit? Yes! Fresh berries, sliced bananas, or diced mango work great. Layer them between the yogurt and topping for extra freshness.
Is this recipe gluten-free? Yes, as written. The ingredients are naturally gluten-free. Check labels on vanilla extract and any optional additions to ensure they're certified gluten-free.
Nutrition Information
Nutritional values are estimated and can vary depending on the ingredients used.
Save this recipe
Print and download options unlock in 30 seconds.
