
Crispy Rice Taco Salad Trays
This crispy rice taco salad tray is the viral dinner that will change your weeknight cooking. Crunchy, cheesy, and loaded with taco toppings – all on one sheet pan!
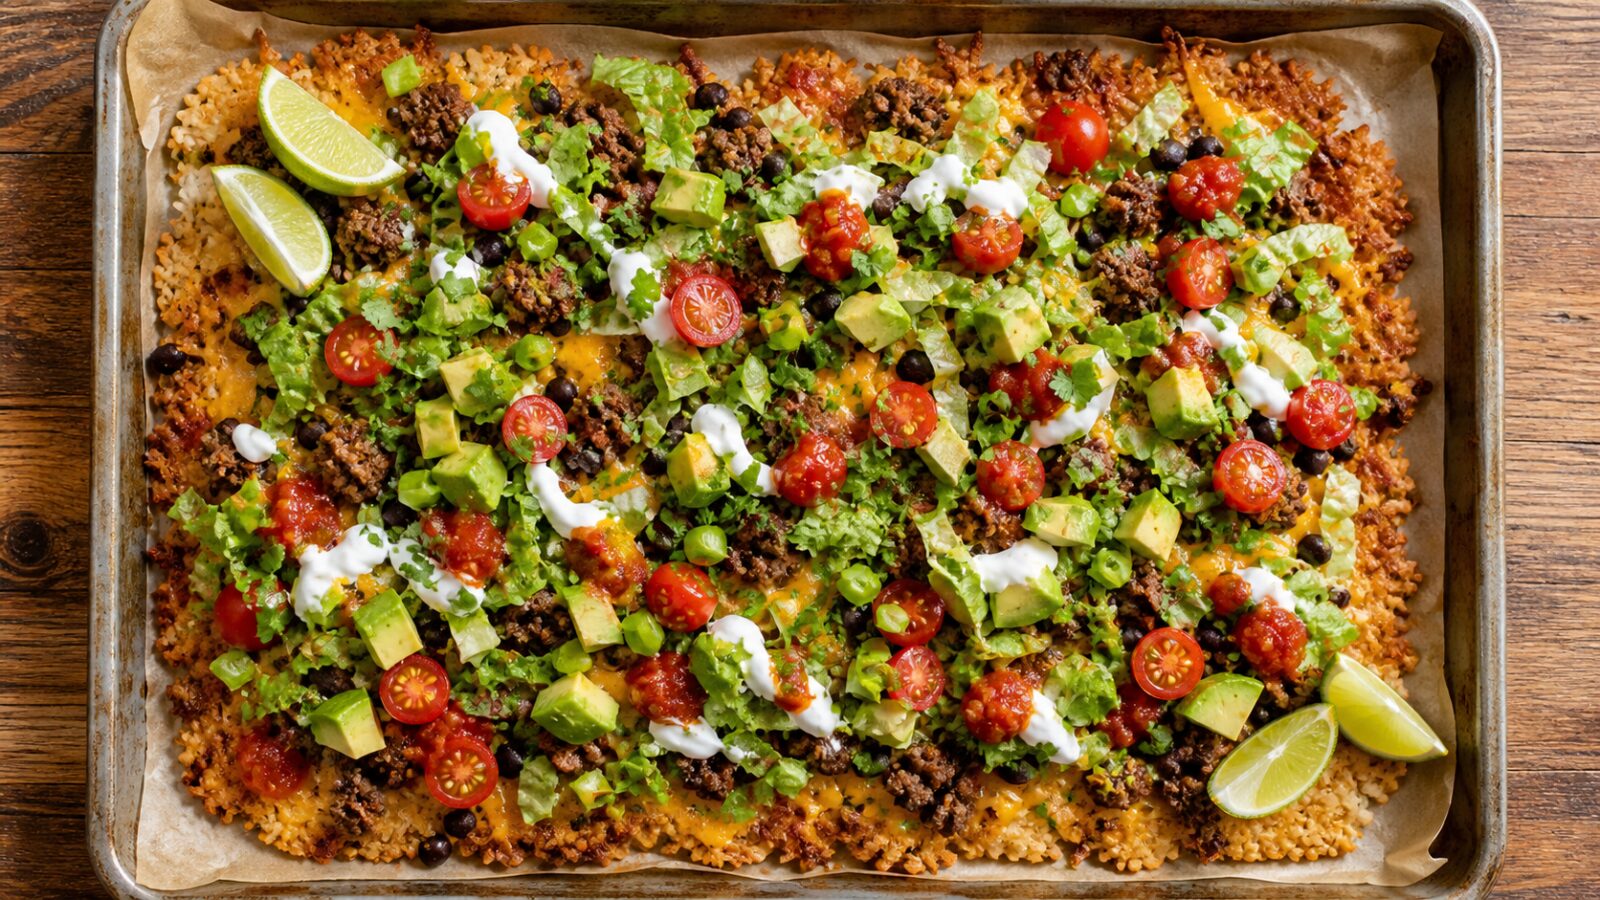
Looking for a dinner that feels like a party but comes together in under 30 minutes? This crispy rice taco salad tray is exactly what you need. It’s the viral taco salad that took over social media, and once you try it, you’ll understand why.
The magic is in the crispy rice. Instead of a regular taco salad bowl, we press seasoned rice onto a baking sheet and bake it until golden and crunchy. Then we pile on all your favorite taco toppings – seasoned ground beef, melty cheese, fresh lettuce, tomatoes, avocado, and a drizzle of creamy dressing. It’s a complete meal on a tray, perfect for busy weeknights or casual get-togethers.
This crunch rice salad isn’t just delicious – it’s also naturally gluten-free (if using certified GF ingredients) and easily customizable. The whole family can build their own tray section, which makes it a hit with picky eaters. Plus, you only need one pan, which means minimal cleanup. Ready to make the best party dinner board? Let’s get started!
Why You'll Love This Recipe
- 30-minute meal – From fridge to table in half an hour, perfect for crazy weeknights.
- One pan wonder – Everything cooks on one baking sheet, so cleanup is a breeze.
- Crispy, crunchy texture – The rice gets golden and crunchy, adding an amazing crunch to every bite.
- Customizable for everyone – Let each person top their own section with whatever they love.
- Great for meal prep – Make the crispy rice base ahead, then add toppings when ready to eat.
- Kid-friendly – Mild flavors and fun assembly make this a family favorite.
- Naturally gluten-free – Use certified GF ingredients and it’s safe for gluten-sensitive guests.
- Budget-friendly – Uses pantry staples like rice, canned beans, and ground beef.
Ingredients
For the crispy rice base:
- 3 cups cooked white or brown rice (day-old or freshly made)
- 2 tablespoons olive oil
- 1 teaspoon chili powder
- 1 teaspoon cumin
- 1/2 teaspoon garlic powder
- 1/2 teaspoon salt
- 1/4 teaspoon black pepper
For the taco meat:
- 1 lb ground beef (80/20 or lean)
- 1 tablespoon olive oil
- 1 medium onion, finely chopped
- 2 cloves garlic, minced
- 1 packet (or 3 tablespoons) taco seasoning
- 1/4 cup water
For the toppings:
- 1 1/2 cups shredded Mexican blend cheese
- 2 cups chopped romaine lettuce
- 1 cup cherry tomatoes, halved
- 1 avocado, diced
- 1/2 cup canned black beans, drained and rinsed
- 1/4 cup sliced black olives
- 1/4 cup chopped fresh cilantro
- 1/2 cup sour cream or Greek yogurt
- 1/2 cup salsa or pico de gallo
- Lime wedges, for serving
Optional Substitutions
- Rice – Use brown rice for more fiber, or cauliflower rice for a low-carb option. Cauliflower rice won’t get as crispy but still tastes great.
- Ground beef – Swap for ground turkey, chicken, or plant-based crumbles. If using lean meat, add an extra tablespoon of oil to prevent dryness.
- Cheese – Try pepper jack for extra heat, or use a dairy-free shred for a vegan version.
- Beans – Black beans are classic, but pinto or refried beans also work. For refried beans, spread them on the rice before adding cheese.
- Toppings – Add corn, pickled jalapeños, or roasted peppers. Use whatever you have on hand.
- Dressing – Instead of sour cream and salsa, try a creamy cilantro lime dressing or ranch.
- Gluten-free – Ensure taco seasoning and all toppings are certified gluten-free. Most are naturally GF.
Instructions
- Preheat your oven to 400°F (200°C). Line a large baking sheet with parchment paper for easy cleanup.
- In a bowl, combine the cooked rice, olive oil, chili powder, cumin, garlic powder, salt, and pepper. Mix well until the rice is evenly coated with the seasoning.
- Transfer the seasoned rice onto the prepared baking sheet. Press it into an even, thin layer (about 1/4 to 1/2 inch thick). Use the back of a spatula or your hands – make sure there are no gaps.
- Bake the rice for 15-20 minutes, until the edges are golden and the rice is crispy. Check at 15 minutes; if not crunchy enough, bake a few more minutes. The rice will continue to crisp as it cools.
- While the rice bakes, cook the taco meat. Heat 1 tablespoon olive oil in a large skillet over medium-high heat. Add the chopped onion and cook until softened, about 3 minutes.
- Add the ground beef and cook, breaking it up with a spatula, until browned, about 5-7 minutes. Drain excess fat if needed.
- Stir in the minced garlic and cook for 1 minute, until fragrant. Sprinkle the taco seasoning over the meat and add the water. Stir well and let simmer until the liquid is mostly absorbed, about 2-3 minutes. Keep warm.
- Once the rice is crispy, remove the baking sheet from the oven. Sprinkle the shredded cheese evenly over the hot rice – the heat will melt it in 2-3 minutes.
- Remove the sheet from the oven and let it cool slightly for about 5 minutes. The cheese will set as it cools.
- Top the crispy rice with the taco meat, then arrange the lettuce, tomatoes, avocado, black beans, olives, and cilantro in sections over the top.
- Dollop sour cream and salsa over the salad, or serve them on the side. Squeeze fresh lime juice over everything just before serving.
- Cut or break the crispy rice into pieces and serve directly from the tray. Let everyone scoop up a piece of crispy rice with toppings – it’s meant to be eaten with your hands or a fork!
Pro Tips
- Use day-old rice – Freshly cooked rice is too moist and won’t crisp well. Cold leftover rice is ideal, but you can spread fresh rice on a plate and refrigerate for 30 minutes.
- Press firmly – The thinner and more compact the rice layer, the crispier it gets. Use a flat-bottomed cup to press it down if needed.
- Don’t skip the oil – Oil helps the rice crisp and adds flavor. You can use avocado oil if preferred.
- Season generously – The rice needs enough salt and spices to stand up to the toppings. Taste the seasoned rice before baking – it should be slightly salty.
- Watch the oven – Ovens vary, so keep an eye after 15 minutes. The edges should be deep golden, but not burnt. If the center is still soft, give it a few more minutes.
- Cool before adding toppings – Let the rice cool for 5-10 minutes so the toppings don’t wilt or get warm. The cheese will still be melty.
- Serve immediately – The crispy rice is best straight out of the oven. If it sits too long, it may lose crunch. If needed, reheat the rice base alone for a few minutes in the oven.
- Make it a party – Set out bowls of additional toppings and let guests build their own tray. It’s perfect for Taco Tuesday gatherings.
Variations and Substitutions
- Chicken Taco Salad – Replace ground beef with shredded rotisserie chicken or cooked chicken breast seasoned with taco spices. It’s a great way to use leftovers.
- Vegetarian Black Bean Tray – Skip the meat and double the black beans. Add roasted corn and bell peppers for extra color and texture.
- Spicy Chorizo Version – Use Mexican chorizo instead of ground beef. Cook chorizo until crispy and crumbled. It adds a spicy, smoky flavor.
- Low-Carb Cauliflower Rice Tray – Swap rice with riced cauliflower. Press and bake as directed, but cauliflower won’t get as crunchy – it will be tender with crispy edges.
- Vegan Cheesy Tray – Use vegan ground “meat,” dairy-free cheese, and vegan sour cream. Nutritional yeast on the rice adds a cheesy flavor.
- Breakfast Taco Tray – Top the crispy rice with scrambled eggs, bacon bits, cheddar, and salsa. Perfect for brunch or dinner for breakfast lovers.
- Loaded Nacho Style – After baking the rice, layer on refried beans, cheese, and meat, then return to the oven for 3-5 minutes to melt everything together. Then add cold toppings.
Storage and Reheating
Fridge
Store leftovers (without toppings that will wilt, like lettuce and avocado) in an airtight container in the refrigerator for up to 3 days. Keep the crispy rice base separate from the meat and wet toppings to maintain crunch. If you stored everything together, the rice will soften.
Freezer
The crispy rice base freezes well. Let it cool completely, then wrap tightly in foil and place in a freezer bag. Freeze for up to 2 months. Thaw in the refrigerator overnight before reheating. Do not freeze assembled trays with toppings.
Reheating
To revive the crunch, reheat the rice base in a preheated oven at 400°F for 5-7 minutes, or in an air fryer at 375°F for 3-4 minutes. Microwave is not recommended as it will make the rice soggy. Reheat the taco meat separately on the stove or in the microwave, then assemble fresh toppings.
FAQ
Can I use instant rice? Yes, but cook it first according to package directions and let it cool completely in the fridge for at least an hour. Instant rice tends to be softer, so pressing thinly is extra important.
How do I make the rice extra crispy? Press the rice into the thinnest even layer possible. Use a little more oil and bake until the edges are deep golden. Let it rest for 5 minutes after baking – it will continue to crisp.
Can I make this dairy-free? Absolutely! Use dairy-free cheese (shreds that melt well) and substitute sour cream with coconut yogurt or a dairy-free ranch. The rest of the recipe is naturally dairy-free.
What if I don’t have a baking sheet? You can use a large oven-safe skillet or a 9×13-inch baking dish. Spread the rice as thinly as possible. You may need to extend the baking time by a few minutes.
Can I prepare this ahead for a party? Yes! Bake the crispy rice base up to 2 days ahead and store it airtight. Cook the taco meat and keep in the fridge. When ready to serve, reheat the rice in the oven and the meat on the stove, then add fresh toppings.
Is this recipe gluten-free? Yes, as long as you use gluten-free taco seasoning and certified gluten-free ingredients. Most standard taco seasonings are gluten-free, but always check the label.
How many people does this serve? This recipe makes about 6-8 servings as a main dish, depending on appetite. It’s also great as an appetizer for a party – then it serves 10-12.
Can I add more vegetables? Definitely! Diced bell peppers, corn kernels, shredded cabbage, or even roasted sweet potatoes would be delicious. Add them as toppings or mix into the meat.
Nutrition Information
Nutritional values are estimated and can vary depending on the ingredients used.
Save this recipe
Print and download options unlock in 30 seconds.