
Easy Dot Cake
A simple dot cake recipe that makes soft, bite-sized vanilla cake balls using a dot mold pan. No rolling, no frosting dipping – just bake and pop out.

Craving something sweet but don’t want to deal with frosting, rolling, or complicated steps? Dot cakes are the answer. These tiny, round vanilla cake balls come out of the oven ready to eat in about 10 minutes. They’re soft, slightly sweet, and perfect for little hands or a quick snack.
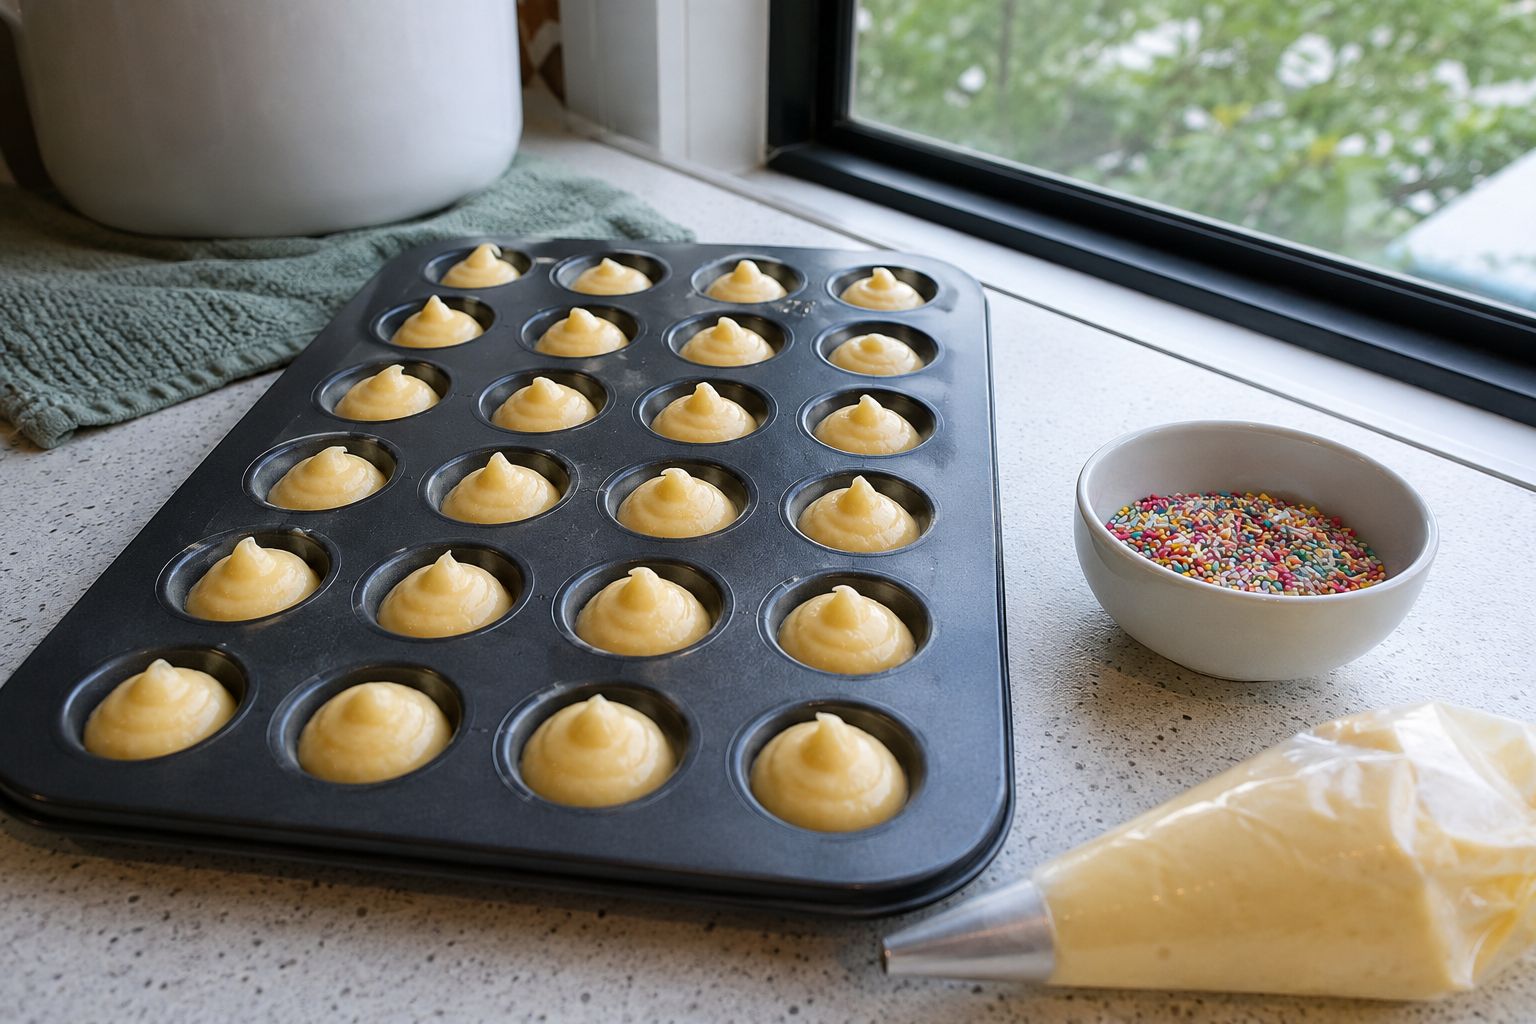
This dot cake recipe uses a dot mold pan – a silicone or metal pan with small hemisphere cavities. The batter is a simple vanilla batter that bakes into puffy little domes. No need to roll cookie dough or dip in frosting. Just mix, fill, bake, and pop the dots out.
The texture is key here. A good dot cake should be light and tender, not dense or gummy. Since the cavities are small, the batter has to be thin enough to fill evenly but thick enough to hold shape. A standard muffin batter works, but we make it a bit looser for the small cavities.
Let’s get into the details so your first batch of dot cakes comes out perfect.
Ingredients
- 1 ½ cups all-purpose flour (180g)
- ½ cup granulated sugar (100g)
- 1 ½ teaspoons baking powder
- ¼ teaspoon salt
- ½ cup milk (120ml), at room temperature
- ¼ cup vegetable oil (60ml)
- 1 large egg, at room temperature
- 1 teaspoon vanilla extract
- Optional: sprinkles, mini chocolate chips, or zest for variation
Instructions
- Preheat the oven to 350°F (175°C). Generously grease a dot cake pan (about 24 cavities, 1-inch diameter each) with butter or nonstick spray. The pan must be well greased for the dots to release cleanly.
- In a medium bowl, whisk together flour, sugar, baking powder, and salt. Set aside.
- In a small bowl or liquid measuring cup, combine milk, oil, egg, and vanilla. Whisk until smooth.
- Pour the wet ingredients into the dry ingredients. Stir gently with a spatula just until the flour disappears – about 12 to 15 strokes. Do not overmix. A few lumps are okay. Overmixing will make the dots tough.
- Transfer the batter to a piping bag or a zip-top bag with a small corner snipped off. This makes filling the small cavities much cleaner than spooning.
- Pipe the batter into each cavity, filling about ¾ full. The batter will rise and dome. Do not overfill, or the dots will run together.
- Bake for 8 to 10 minutes. At 8 minutes, check for doneness: the edges should be golden brown and the tops spring back when lightly touched with a finger. A toothpick inserted into the center of a dot should come out clean or with just a few moist crumbs.
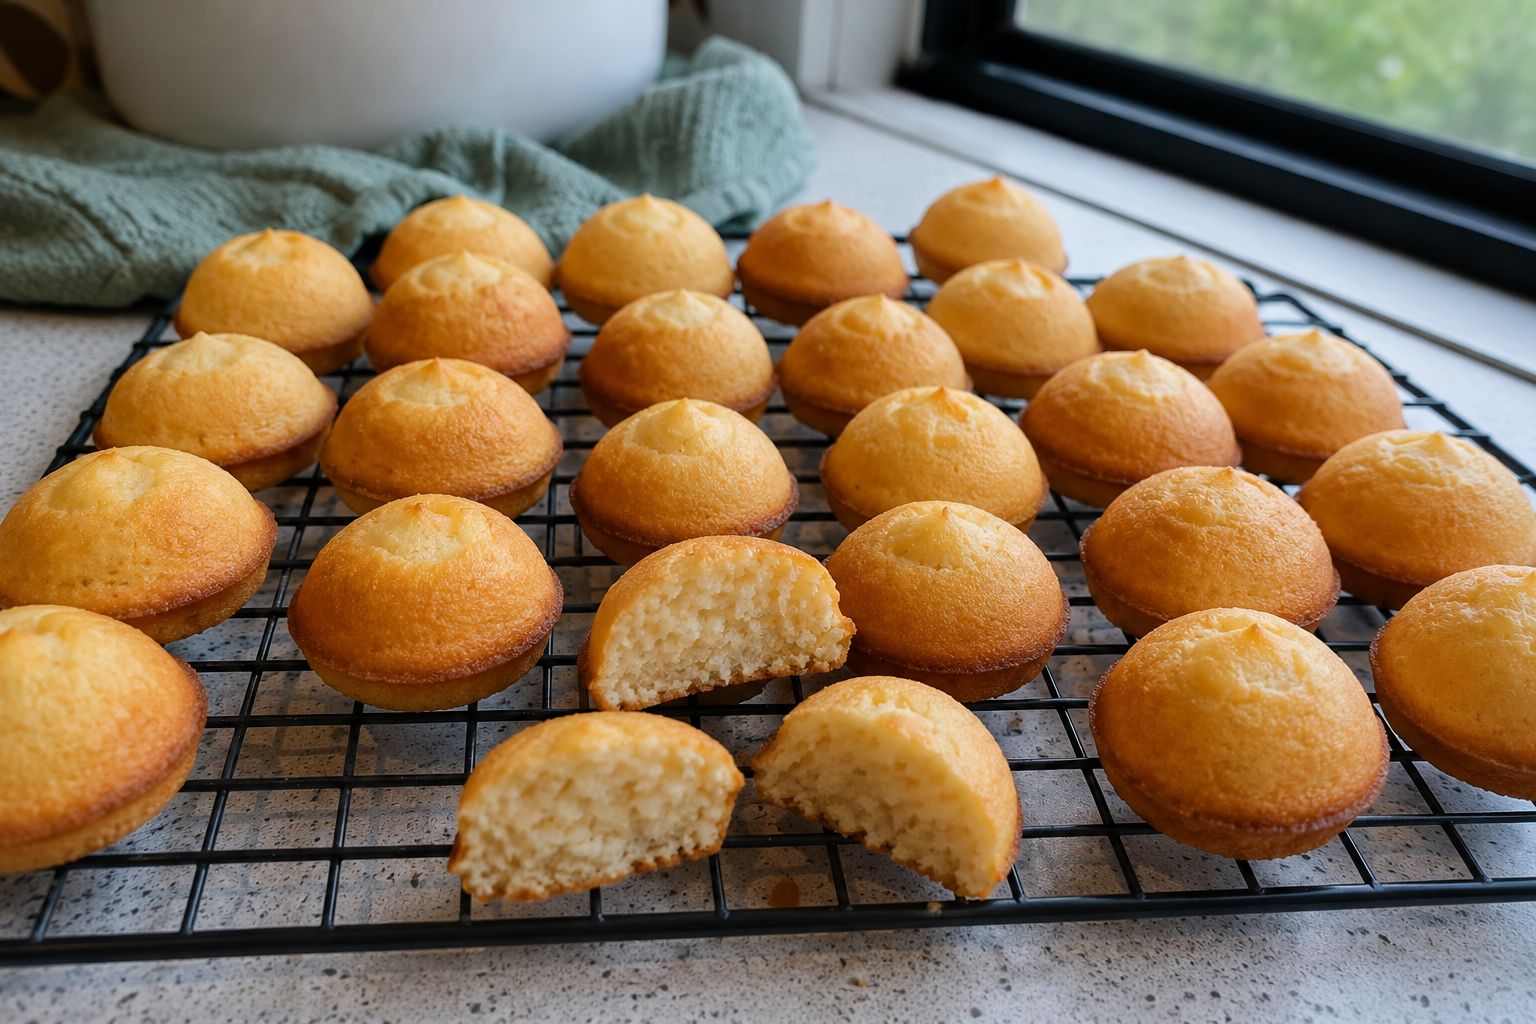
- Let the pan cool on a wire rack for exactly 2 minutes. Then invert the pan over the rack – most dots should fall out easily. If any stick, gently loosen with a small offset spatula or toothpick.
- Cool completely on the rack before storing or serving. The dots will be very tender when warm; they firm up as they cool.
Texture and Doneness Cues
Watch for the dome. When the batter rises slightly above the rim of the cavity and turns a light golden brown, they’re close. At 8 minutes, the bottom of each dot (the part that baked against the pan) should look golden, not pale. If the underside is still white, bake 1 more minute.
When you press the top of a dot with your fingertip, it should spring back immediately. If it leaves an indent, bake another 30 to 60 seconds. The internal temperature should reach about 200°F (93°C) if you want to be exact. A digital thermometer inserted into the center of a dot is the most reliable test.
The batter consistency matters. It should be thick but pourable – think of thick pancake batter. If it’s too thick to pipe easily, add 1 tablespoon of milk. If it’s too runny to hold a dome shape, add 1 tablespoon of flour.
Smart Substitutions
Dairy-free: Replace milk with oat milk or almond milk. Use a neutral-tasting oil like canola or avocado. The dots may be slightly less tender, but still good.
Eggless: Replace the egg with ¼ cup unsweetened applesauce (60g) or a flax egg (1 tablespoon ground flaxseed + 3 tablespoons water). The dots will be a bit more dense and slightly less puffy, but still work.
Gluten-free: Use a 1:1 gluten-free baking flour blend that contains xanthan gum. Avoid almond or coconut flour – they change the texture too much.
What changes if you use melted butter instead of oil? Butter adds more flavor but the dots will be less tender and may brown faster. If you substitute butter, reduce the amount to 3 tablespoons (42g) and watch the bake time – they might be done at 7 minutes.
Make-Ahead Notes
One of the best things about this dot cake recipe is you can prep the batter ahead. Mix the dry ingredients in one bowl and the wet ingredients in another, then cover and refrigerate for up to 24 hours. When ready to bake, combine and fill the pan right away. The batter should not sit in the pan or at room temperature for more than 10 minutes before baking – the leavening starts reacting immediately.
You can also freeze baked unfrosted dot cakes (see Storage section).
Troubleshooting
If your dot cakes stick to the pan, it’s almost always because the pan wasn’t greased well enough. Use a pastry brush to coat every cavity with melted butter or a nonstick spray that contains flour (like Baker’s Joy). Let the pan cool for exactly 2 minutes before inverting – any longer and the steam condenses, making them stick again.
If the dots come out flat, your baking powder may be expired. Test it: put a teaspoon of baking powder in hot water – if it bubbles vigorously, it’s fine. Another cause is overmixing the batter – mix just until combined.
If the dots are pale on the bottom, the oven temperature might be too low. Use an oven thermometer to check accuracy. Also, make sure the pan is on the middle rack.
Storage and Reheating
Fridge
Store cooled dot cakes in an airtight container at room temperature for up to 3 days. Do not refrigerate unless you added perishable fillings – refrigeration dries them out faster. If you must refrigerate, place a paper towel in the container to absorb moisture.
Freezer
Dot cakes freeze beautifully. Arrange cooled dots in a single layer on a baking sheet and freeze until firm (about 1 hour). Transfer to a freezer-safe zip-top bag for up to 3 months. The texture after thawing remains nearly fresh.
Reheating
Icebox-cold dots can be enjoyed straight from the fridge. To bring them back to room temperature, let sit for 15 minutes. For a just-baked feel, microwave 5 to 7 dots on a plate for 10 to 15 seconds. Do not overheat or they toughen.
FAQ
Can I use a mini muffin pan instead of a dot cake pan? Yes. Use a standard mini muffin pan and adjust the bake time to 10 to 12 minutes. The dots will be larger and flatter on top. Reduce the filling to ½ full per cavity.
Can I add frosting to dot cakes? Absolutely. Once cooled, you can dip the tops in melted chocolate or apply a thin layer of buttercream. Keep in mind that icing adds sweetness – the base recipe is only lightly sweet.
My batter overflowed. What happened? You filled the cavities too full. For dot cake molds, ¾ full is the rule. The batter needs room to puff up without spilling into neighboring cavities.
Can I make these in advance for a party? Yes. Bake 1 to 2 days ahead and store at room temperature in an airtight container. They stay soft and moist. Do not frost until the day of serving.
Why did my dot cakes become dry? Overbaking is the most common cause. Check at 8 minutes and remove as soon as they spring back. Also, make sure you used oil – oil keeps them tender longer than butter.
Can I use cake mix? Yes. Prepare 1 cup of your favorite vanilla boxed cake mix according to package directions (minus any water or egg modifications – just use the mix as a base) and then pipe into the dot pan. Bake time remains 8 to 10 minutes. The flavor and texture will be different but still good.
How do I make chocolate dot cakes? Replace ¼ cup of the flour with ¼ cup unsweetened cocoa powder (20g). You may need 1 extra tablespoon of milk to keep the batter consistency right.

Nutrition Information
Nutritional values are estimated and can vary depending on the ingredients used.
Save this recipe
Print and download options unlock in 30 seconds.