
Cherry Coded Cheesecake Bars
These cherry cheesecake bars are an easy, crowd-pleasing dessert with a buttery crust, creamy cheesecake filling, and sweet cherry topping. They’re simple enough for busy weeknights and special enough for parties, potlucks, and make-ahead dessert planning.
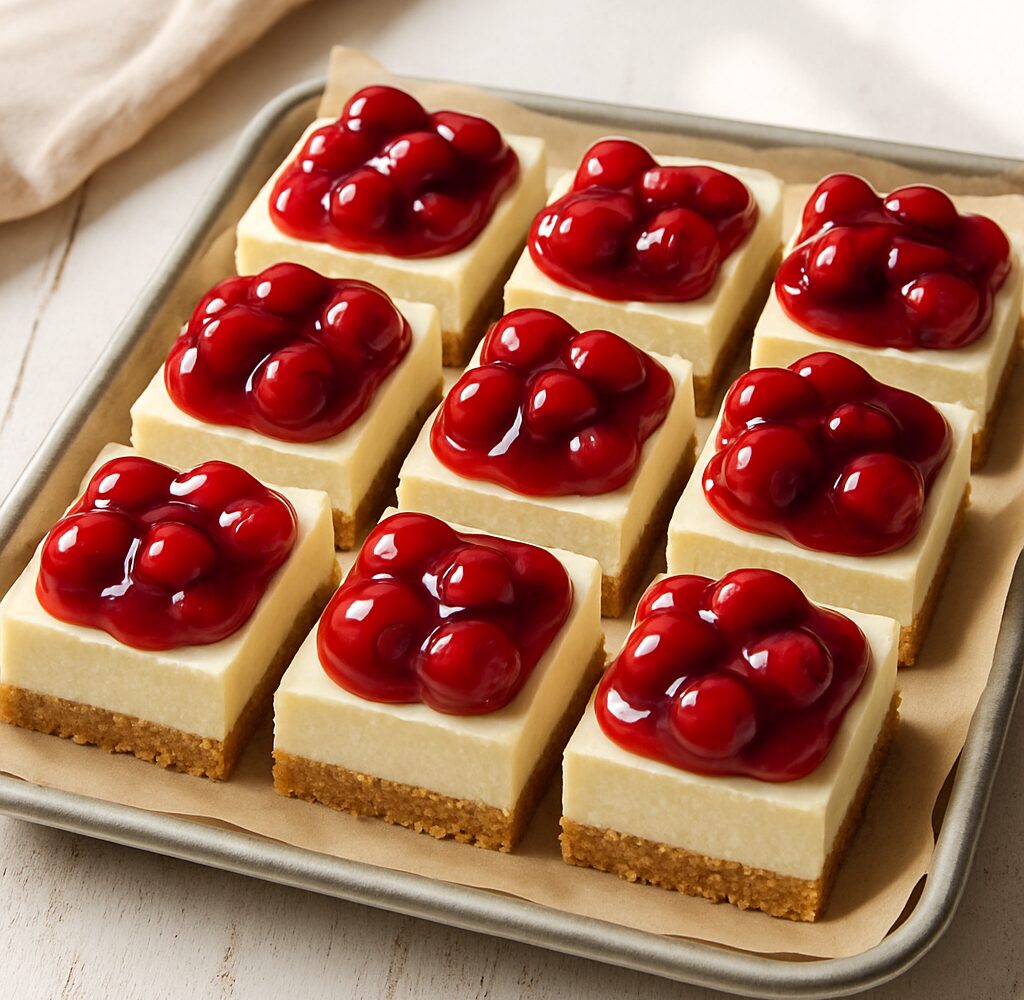
Cherry Coded Cheesecake Bars are the kind of dessert that makes life easier without feeling plain. You get a buttery crust, a smooth cheesecake layer, and a bright cherry topping all in one easy pan. They look bakery-worthy, but the steps are simple enough for beginner home cooks and busy families.
If you need a dessert that can be made ahead, travels well, and feeds a crowd, these cherry cheesecake bars are a smart choice. They are ideal for summer cookouts, school events, holiday dessert tables, or any day when you want something sweet in the fridge that feels ready when you are.
This recipe keeps the process practical. The crust comes together quickly, the filling uses familiar pantry and dairy staples, and the cherry topping adds just enough sweetness and color to make the bars feel special. If you love easy cheesecake bars that slice cleanly and hold their shape, this is one to save.
Why You'll Love This Recipe
- Easy enough for beginners. The steps are straightforward, and you do not need a water bath or springform pan.
- Perfect make-ahead dessert. These bars need time to chill, which makes them ideal when you want dessert finished before guests arrive.
- Creamy and sweet with a buttery base. Every bite has the classic cheesecake texture people love, balanced by a simple crust and fruity topping.
- Great for parties and potlucks. Bars are easier to transport, serve, and portion than a traditional cheesecake.
- Family-friendly flavor. Most kids and adults love the sweet cherry topping and smooth filling.
- Simple ingredients. You probably have several of the ingredients already, and the rest are easy to find at any grocery store.
- Works for many occasions. This is a summer dessert, holiday dessert, bake sale option, or weekend treat.
- Slices beautifully when chilled. Once set, the bars cut into neat squares that look impressive on a platter.
Ingredients
Here is everything you need to make these cherry cheesecake bars. The amounts below make one 9×13-inch pan.
For the crust
- 2 cups graham cracker crumbs – about 16 full sheets, finely crushed
- 1/2 cup unsalted butter, melted – helps the crust hold together
- 1/4 cup granulated sugar – adds a little sweetness and helps the crust bake up flavorful
- 1/4 teaspoon fine salt – balances the sweetness
For the cheesecake filling
- 16 ounces cream cheese, softened – use full-fat cream cheese for the best texture
- 1 cup granulated sugar – sweetens the filling without making it grainy
- 2 large eggs – help the cheesecake layer set
- 1 teaspoon vanilla extract – gives the filling a warm, classic flavor
- 1/2 cup sour cream – adds tang and helps the filling stay smooth
- 2 tablespoons all-purpose flour – helps stabilize the cheesecake layer for cleaner slices
- Pinch of salt – enhances the flavor
For the cherry topping
- 1 can (21 ounces) cherry pie filling – the easiest way to get a glossy, sweet topping
- 1 tablespoon lemon juice, optional – brightens the flavor of canned filling
Optional finishing touches
- Whipped cream – for serving
- Fresh cherries – for garnish when in season
- A light dusting of powdered sugar – optional, for a pretty finish
Optional Substitutions
- Graham cracker crumbs: Use vanilla wafer crumbs, shortbread cookie crumbs, or digestive biscuits for a different crust flavor. Shortbread makes the bars richer, while vanilla wafers make them sweeter.
- Sour cream: Plain Greek yogurt works in a pinch. It keeps the filling tangy, though the texture may be slightly less rich.
- Cherry pie filling: Swap in blueberry, strawberry, raspberry, or mixed berry pie filling if you want a different fruit topping.
- All-purpose flour: Use 1 tablespoon of cornstarch instead of flour if you need a slightly lighter texture or want to avoid wheat flour.
- Butter: Salted butter can be used instead of unsalted butter. If you do, reduce the added salt slightly.
- Cream cheese: For a lighter version, use reduced-fat cream cheese, but expect a softer filling and a slightly less creamy result.
- Gluten-free option: Use gluten-free graham crackers or cookie crumbs and check that the cherry filling is gluten-free.
- Lower sugar option: Use a reduced-sugar cherry topping and slightly reduce the filling sugar, though the bars may set and taste a little differently.
Instructions
- Preheat the oven and prepare the pan. Set your oven to 350°F. Line a 9×13-inch baking pan with parchment paper, leaving some overhang on the sides if possible. This makes lifting and slicing the bars much easier later.
- Make the crust mixture. In a medium bowl, stir together the graham cracker crumbs, melted butter, sugar, and salt until the mixture looks like damp sand. Every crumb should be moistened, but it should not be greasy.
- Press the crust into the pan. Pour the crumb mixture into the prepared pan and press it down firmly and evenly. Use the bottom of a measuring cup to help compact it, especially in the corners. A tightly packed crust helps the bars hold together when sliced.
- Bake the crust briefly. Bake the crust for about 8 to 10 minutes, just until it looks lightly set and fragrant. You are not looking for deep browning. This short bake helps the base stay crisp under the cheesecake layer.
- Start the filling. While the crust cools slightly, beat the softened cream cheese in a large bowl until smooth and lump-free. This step matters, because cold cream cheese can leave little lumps that are hard to fix later.
- Add the sugar and flavorings. Beat in the sugar, sour cream, vanilla, flour, and pinch of salt until combined. Scrape down the sides of the bowl so nothing is left unmixed. The batter should look thick, creamy, and glossy.
- Mix in the eggs carefully. Add the eggs one at a time, mixing on low speed just until each egg disappears into the batter. Do not overmix once the eggs are in. Too much mixing can add extra air, which may cause cracks or a puffed center that sinks later.
- Spread the filling over the crust. Pour the cheesecake mixture over the warm crust and smooth the top with a spatula. Tap the pan gently on the counter once or twice to release any large air bubbles.
- Bake until just set. Bake for 25 to 30 minutes, or until the edges look set and the center has a slight jiggle when you gently nudge the pan. The middle should not look wet, but it should not be rock solid either. Cheesecake continues to firm as it cools.
- Add the cherry topping. Remove the bars from the oven and let them cool for about 10 minutes. Then spoon the cherry pie filling evenly over the top. If you like, stir the filling with lemon juice first for a brighter finish. Adding the topping after a short cooling period helps keep it from sinking into the cheesecake layer.
- Cool completely, then chill. Let the pan cool to room temperature, then cover and refrigerate for at least 4 hours, or overnight if possible. This chilling time is what gives the bars their clean slices and classic cheesecake texture.
- Slice and serve. Lift the bars out using the parchment overhang, if used. Cut into squares with a sharp knife. For the neatest edges, wipe the knife clean between cuts and chill the bars well before slicing.
Pro Tips
- Use softened cream cheese, not cold cream cheese. Softened cream cheese blends smoothly and prevents lumps in the filling.
- Do not overmix after adding the eggs. Overmixing can add too much air and affect the final texture.
- Press the crust firmly. A loose crust can crumble when you slice the bars.
- Bake until just set. The center should still have a little movement. If you bake until the middle is fully firm in the oven, the bars may end up dry.
- Cool before adding the topping. A short cooling period keeps the cherry layer neat and prevents it from sliding around too much.
- Chill long enough. Four hours is the minimum, but overnight gives the best flavor and texture.
- Use parchment for easy lifting. This makes removing the whole slab from the pan much cleaner.
- Slice with a warm, dry knife. Warm the blade under hot water, dry it well, and wipe clean between cuts for tidy squares.
- Choose a good cherry filling. A quality cherry pie filling makes a big difference in flavor and appearance since it is the top layer.
Variations and Substitutions
- Chocolate cherry cheesecake bars. Add 1/2 cup mini chocolate chips to the cheesecake layer or drizzle melted chocolate over the chilled bars before serving. This gives the bars a dessert-shop flavor.
- Lemon cherry bars. Add 1 teaspoon lemon zest to the filling and use a little extra lemon juice in the topping for a brighter, more summery flavor.
- Almond cherry bars. Stir 1/2 teaspoon almond extract into the cheesecake filling. Almond and cherry pair especially well and make the bars taste a little more bakery-style.
- No-bake style idea. For a softer, cooler dessert, use a no-bake cheesecake filling and a chilled graham crust. The texture will be different, but the bars will still be easy and crowd-friendly.
- Fresh cherry topping. If cherries are in season, make a quick topping by simmering pitted cherries with a little sugar and cornstarch until glossy and thick.
- Mixed berry version. Use blueberry or strawberry pie filling instead of cherry for a different color and flavor, while keeping the same easy method.
- Holiday version. Add a handful of chopped pecans or a sprinkle of crushed freeze-dried cherries on top for extra texture and a festive look.
- Cupcake-style mini bars. Press the crust and filling into lined muffin tins for individual cheesecake bites. Reduce baking time and watch closely, since they will set faster than a full pan.
Storage and Reheating
Fridge
Store the bars in an airtight container in the refrigerator for up to 5 days. If stacking them, place parchment paper between layers so the cherry topping stays neat. These cherry cheesecake bars are a great make ahead dessert because the texture actually improves after chilling.
Freezer
Freeze the bars for up to 2 months. For best results, chill them fully first, then cut into squares and freeze on a baking sheet until firm. Wrap each bar tightly in plastic wrap and place them in a freezer-safe container or bag. Thaw in the refrigerator overnight before serving.
Reheating
These bars are best served cold or lightly chilled, so reheating is usually not necessary. If you prefer a softer texture, let a bar sit at room temperature for 10 to 15 minutes before serving. Avoid microwaving the bars, since it can make the cheesecake layer too soft and the topping runny.
FAQ
Can I make cherry cheesecake bars ahead of time? Yes. In fact, they are better when made ahead because the filling has time to fully chill and set. Make them the day before serving for the cleanest slices and best texture.
Can I use fresh cherries instead of cherry pie filling? Yes, but you will need to cook them down first with sugar and a thickener like cornstarch so the topping sets properly. Fresh cherries are delicious, but canned pie filling is the easiest option.
How do I know when the cheesecake layer is done? The edges should look set and the center should jiggle only slightly when you gently move the pan. It should not look liquid or sloshy. The bars will firm up more as they cool.
Why did my cheesecake bars crack? Cracks usually happen from overmixing, overbaking, or cooling too quickly. Even if the top cracks a little, the cherry topping hides most imperfections and the bars will still taste great.
Can I make these in a smaller pan? Yes, but the baking time will change. An 8×8-inch or 9×9-inch pan will create thicker bars and need more baking time. Keep an eye on the center and judge doneness by the slight jiggle.
What is the best way to get clean slices? Chill the bars thoroughly, then use a sharp knife warmed under hot water and dried before each cut. Wiping the blade between slices also helps keep the edges neat.
Can I use low-fat cream cheese? You can, but the filling may be softer and slightly less rich. Full-fat cream cheese gives the best cheesecake texture and flavor.
What should I serve with cherry cheesecake bars? They are great on their own, but you can also serve them with whipped cream, fresh berries, or a scoop of vanilla ice cream. For parties, place them on a dessert tray with other easy finger desserts.
Nutrition Information
Nutritional values are estimated and can vary depending on the ingredients used.
Save this recipe
Print and download options unlock in 30 seconds.