
Air Fryer Chicken Breast That Stays Juicy
This air fryer chicken breast is tender, flavorful, and reliably juicy with a simple seasoning mix and an easy cooking method. It is a fast, family-friendly dinner that works for meal prep, busy weeknights, and healthy lunches.
If you have ever pulled chicken breast out of the air fryer only to find it dry and stringy, this recipe is for you. Air frying can make chicken incredibly convenient, but the real secret is using the right seasoning, a little oil, and a cooking method that protects the meat from overcooking.
This air fryer chicken breast juicy recipe is designed for real life. It uses simple ingredients you probably already have, comes together quickly, and gives you dependable results even if you are new to the air fryer. It is a great choice for busy weeknights, lunch meal prep, or those evenings when you need a healthy dinner without a lot of effort.
The best part is how versatile it is. Serve the chicken with vegetables, rice, potatoes, salad, or tuck it into wraps and sandwiches. Once you learn this method, you will have an easy protein you can make again and again.
Why You'll Love This Recipe
- The chicken stays juicy. A short marinade or seasoning with oil helps the chicken stay tender instead of drying out in the air fryer.
- It is fast. Most boneless chicken breasts cook in about 16 to 20 minutes, depending on thickness.
- It uses simple ingredients. No fancy steps, no hard-to-find spices, and no long marinating time required.
- It is beginner-friendly. If you can season chicken and flip it halfway through, you can make this recipe successfully.
- It works for meal prep. Make a batch at the start of the week and use it for salads, bowls, wraps, and quick lunches.
- It is family-friendly. The seasoning is savory and mild enough for kids, but easy to customize for adults who want more flavor.
- It is a healthy dinner option. Chicken breast is lean, high in protein, and pairs well with vegetables and whole grains.
- Cleanup is easy. The air fryer basket means fewer dishes than pan-frying or roasting in the oven.
Ingredients
Here is everything you need to make juicy chicken breast in the air fryer:
- 2 large boneless, skinless chicken breasts about 1 1/4 to 1 1/2 pounds total
- 1 tablespoon olive oil helps the seasoning stick and supports browning
- 1 teaspoon kosher salt or 3/4 teaspoon fine salt
- 1 teaspoon paprika adds color and mild flavor
- 1 teaspoon garlic powder for savory depth
- 1/2 teaspoon onion powder adds a little sweetness and balance
- 1/2 teaspoon black pepper for a gentle bite
- 1/2 teaspoon dried Italian seasoning optional, but it adds a nice herby note
- 1/4 teaspoon smoked paprika optional, for a subtle smoky flavor
Ingredient notes
Chicken breast thickness matters. If one breast is much thicker than the other, the thinner piece can dry out before the thicker piece finishes. For best results, try to use similar-sized pieces or gently pound them to an even thickness.
A little oil makes a difference. It helps the seasoning cling to the surface and keeps the outside from looking dry. You do not need much, just enough to lightly coat the chicken.
Salt is important. It brings out flavor and helps the chicken taste seasoned all the way through. If you are using a seasoning blend that already contains salt, reduce the added salt accordingly.
Optional Substitutions
- Use avocado oil instead of olive oil. It has a neutral flavor and works well at air fryer temperatures.
- Swap the seasonings for a store-bought blend. A no-salt or low-sodium chicken seasoning can save time, but check the salt level before adding extra.
- Use chicken cutlets or thin-sliced breasts. They will cook faster, so start checking for doneness earlier.
- Try chicken thighs instead. Boneless, skinless thighs are even more forgiving and naturally juicy, though the texture and cook time will be different.
- Replace paprika with chili powder. This adds a little warmth and more noticeable spice without making the dish hot.
- Use lemon pepper seasoning. This gives the chicken a brighter, tangier flavor that pairs well with vegetables and rice.
- Skip the Italian seasoning. The chicken will still taste great with just salt, pepper, garlic, and paprika.
- Use a salt-free seasoning if you are watching sodium. Add a squeeze of lemon after cooking to boost flavor without extra salt.
Instructions
- Preheat the air fryer. Set it to 375°F and let it heat for about 3 to 5 minutes. Preheating helps the chicken start cooking right away and improves browning.
- Prepare the chicken breasts. Pat the chicken dry with paper towels. This helps the seasoning stick and keeps the surface from steaming.
- Even out the thickness. If one end of each breast is much thicker, gently pound the thicker portion with a meat mallet or rolling pin until the chicken is more even. This step helps the chicken cook evenly and stay juicy.
- Season the chicken. Place the chicken in a bowl or on a plate. Drizzle with olive oil, then sprinkle on the salt, paprika, garlic powder, onion powder, black pepper, and Italian seasoning if using. Rub the seasoning all over both sides so the chicken is coated evenly.
- Place the chicken in the basket. Arrange the chicken breasts in a single layer in the air fryer basket. Leave a little space around each piece so the hot air can circulate. If your basket is small, cook in batches instead of crowding the chicken.
- Cook the chicken. Air fry at 375°F for 10 minutes.
- Flip and continue cooking. Carefully turn the chicken breasts over and cook for another 6 to 10 minutes, depending on thickness. Thicker breasts may need the full amount of time. Thin breasts may finish sooner.
- Check the temperature. Use a meat thermometer in the thickest part of the chicken. The chicken is done when it reaches 165°F. If it is close but not quite there, cook for 1 to 2 more minutes and check again.
- Rest before slicing. Transfer the chicken to a cutting board and let it rest for 5 minutes. This is one of the most important steps for keeping chicken breast juicy, because the juices settle back into the meat.
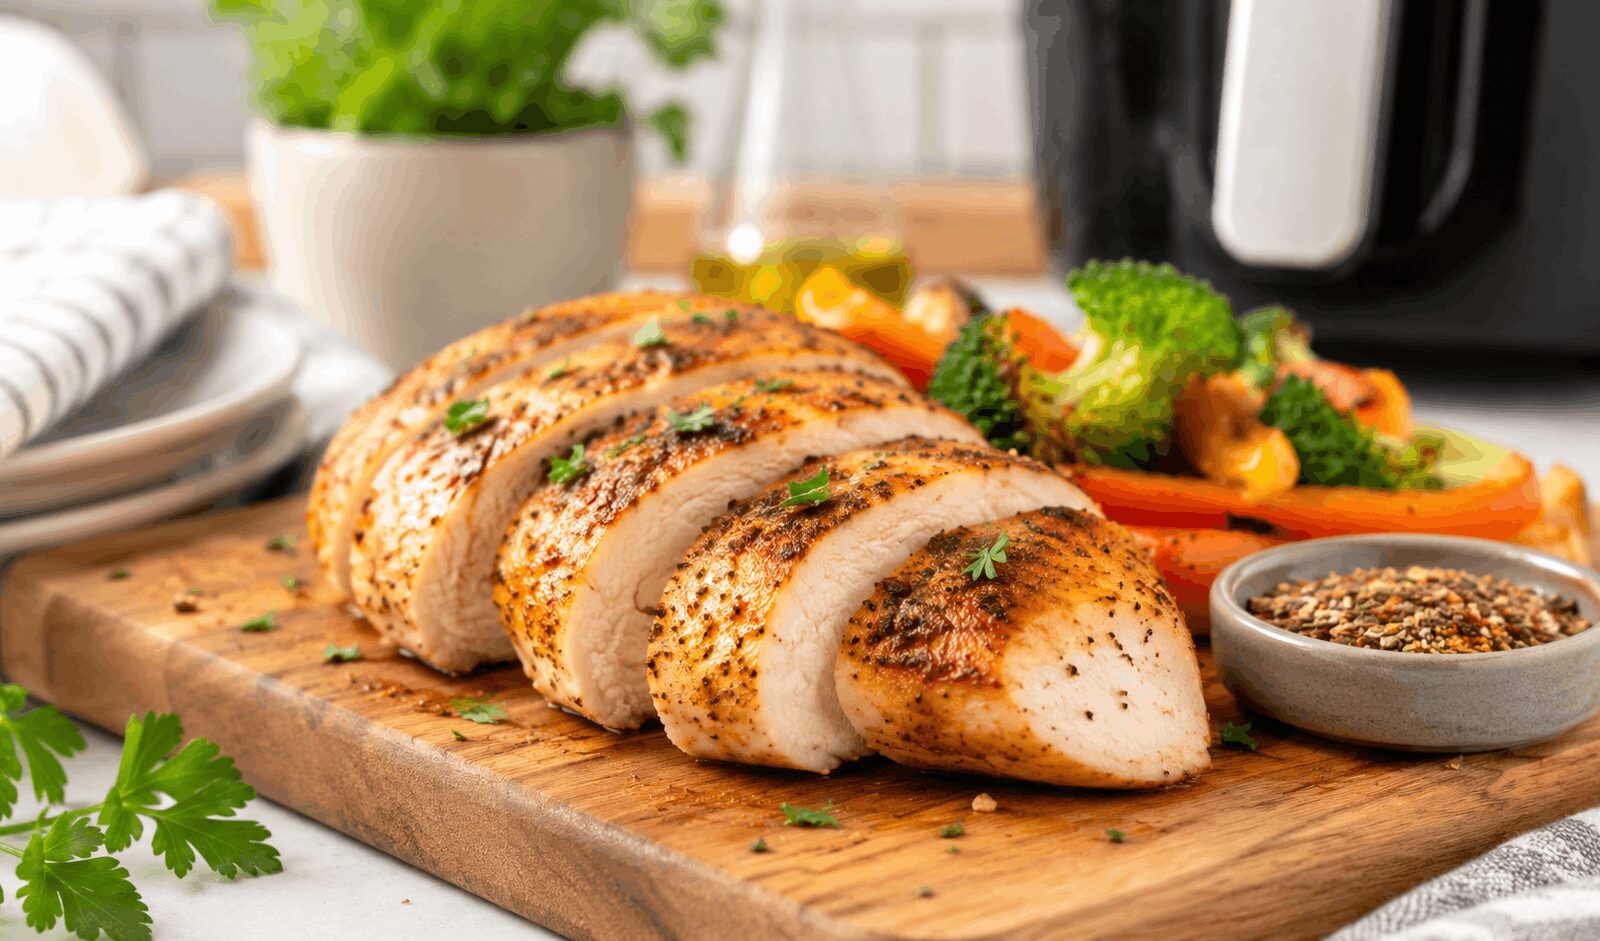
- Slice and serve. Slice against the grain for the most tender texture. Serve warm with your favorite sides or use it in salads, wraps, bowls, or sandwiches.
Pro Tips
- Use a thermometer, not guesswork. The most common reason chicken breast turns dry is overcooking. Pull it at 165°F and no later.
- Do not skip the rest time. Cutting too soon lets the juices run out onto the cutting board instead of staying in the meat.
- Pound thick chicken breasts for even cooking. This keeps the thin end from drying out while the thicker end finishes.
- Avoid overcrowding the basket. Air needs to move around the chicken for even browning and proper cooking.
- Dry the chicken before seasoning. Moisture on the surface can prevent the seasoning from sticking well.
- If your chicken breasts are very large, split them. Extra-large breasts can cook unevenly. Cutting them in half lengthwise can make them easier to manage.
- A light coat of oil matters. Too much oil can make the seasoning slide off, but a small amount helps with flavor and texture.
- Let the air fryer do the work. Opening the basket too often drops the temperature and can affect the final texture.
- Slice for the meal you need. Thin slices are perfect for wraps and salads; thicker slices are better for dinner plates and bowls.
Variations and Substitutions
- Lemon garlic chicken: Add 1 teaspoon lemon zest and finish with fresh lemon juice after cooking. This makes the chicken brighter and especially good with vegetables and rice.
- Spicy paprika chicken: Add 1/4 to 1/2 teaspoon cayenne pepper or red pepper flakes for more heat. Great if you want a bolder weeknight dinner.
- Herb chicken: Use rosemary, thyme, and parsley instead of Italian seasoning for a more classic, savory flavor.
- Parmesan-style chicken: Sprinkle the chicken with 2 to 3 tablespoons finely grated Parmesan during the last 2 minutes of cooking. The cheese adds a salty crust.
- BBQ version: Brush with barbecue sauce during the last 2 to 3 minutes of cooking. Add the sauce near the end so the sugar does not burn.
- Taco chicken: Use chili powder, cumin, garlic powder, and a little smoked paprika. Slice for tacos, burrito bowls, or nachos.
- Honey mustard chicken: Brush with a small amount of honey mustard after cooking or during the final minute for a sweet-savory finish.
- Low-sodium version: Reduce the salt and use more garlic, pepper, paprika, and fresh lemon juice to keep the flavor strong without relying on sodium.
Storage and Reheating
Fridge
Store cooled chicken breast in an airtight container in the refrigerator for up to 4 days. For best texture, slice only what you need and keep the rest whole if possible. Whole pieces usually stay juicier than pre-sliced chicken.
Freezer
Freeze cooked chicken for up to 3 months. Wrap each piece tightly or place it in a freezer-safe bag with the air pressed out. For easier use later, slice the chicken before freezing if you plan to add it to bowls, soups, or wraps.
Reheating
Reheat gently so the chicken stays tender. The air fryer works well at 350°F for 3 to 5 minutes, depending on thickness. You can also reheat in the microwave at 50% power in short bursts, covered with a damp paper towel to help preserve moisture. Add a splash of broth or water if the chicken seems dry. Reheat only until warm, not until it is overcooked.
FAQ
Why does my air fryer chicken breast turn dry?
The most common reasons are overcooking, chicken breasts that are too thick on one end, or skipping the rest time. Use a thermometer and remove the chicken as soon as it reaches 165°F. Pounding the chicken to an even thickness also helps a lot.
Do I need to marinate the chicken first?
No, this recipe is designed to work without a long marinade. The olive oil and seasoning are enough for a flavorful result. If you want extra flavor, you can season the chicken 30 minutes ahead of time or marinate it for a few hours, but it is not required.
Can I use frozen chicken breast in the air fryer?
It is better to thaw chicken first for this recipe because thawed chicken cooks more evenly and stays juicier. If you must cook from frozen, the time will be longer and the seasoning may not stick as well.
How do I know when the chicken is done?
The safest and most reliable way is to check the internal temperature with a meat thermometer. The thickest part should reach 165°F. The juices should run clear, and the center should no longer look raw or translucent.
Can I make this recipe ahead of time?
Yes. You can season the chicken up to 24 hours ahead and keep it covered in the refrigerator. You can also cook it in advance for meal prep and store it in the fridge for quick lunches and dinners all week.
What should I serve with air fryer chicken breast?
It goes with almost anything. Try roasted vegetables, mashed potatoes, rice, pasta, salad, green beans, corn, or sweet potatoes. It also works well in wraps, grain bowls, and sandwiches.
Can I use chicken tenders instead of breasts?
Yes, but they cook faster. Start checking them earlier so they do not dry out. Chicken tenders are a great option if you want a quick easy protein for kids or meal prep.
How do I keep the seasoning from falling off?
Make sure the chicken is dry before adding the oil and seasoning. The oil helps everything stick. You can also rub the seasoning in with your hands so it adheres better before the chicken goes into the basket.
Nutrition Information
Nutritional values are estimated and can vary depending on the ingredients used.
Save this recipe
Print and download options unlock in 30 seconds.